Posted by Nexgen Outfitter Dan Gurr on Feb 6th 2024
Field Strip Handgun for Regular Cleaning and Inspection
INTRODUCTION
Responsible gun ownership is something we are obsessed with
here at Nexgen Outfitters. In the last
year, we have been grateful for the chance to help record numbers of people
purchase the best firearm to fit their next hunting or training scenario. Many times, it has been their FIRST gun, and
according to the National Shooting Sports Foundation there were over 8 million
first time gun buyers in 2020 based on their analysis of the ATF’s National
Instant Criminal Background Check System (NICS). So now more than ever our obsession with safe
transport, safe usage, safe storage, and diligent maintenance continues to
grow.
So many first time buyers also need a reminder of how to properly break-in a new handgun, so stay tuned for our piece detailing that process soon.
In this piece, the focus will be breaking down a semi-auto handgun for a simple routine cleaning and inspection. We like to compare this to the ol’ 3,000-mile oil change for your vehicle. Also much like the timing of your car’s oil change, the frequency of when to field strip and clean your handgun varies based on several effects. For example, use of the firearm during harsh field conditions like rain, snow, mud, or blowing sand and dirt should dictate a cleaning sooner than “normal”. Powder used for rimfire ammunition inherently leaves more residue than most centerfire ammo, so a .22cal pistol will need refreshed more often. On the other hand, if you are primarily shooting high quality ammo at an indoor facility and allowing the firearm to cool between volleys, then you can stretch in a few extra rounds before a scrub. Comparing one more time back to vehicle maintenance, our suggestion is that ~500 clean burning centerfire rounds is about the same as the 3,000-mile mark. And the best news is that this crucial process is inexpensive, only takes a few minutes (maybe not the very first time) and allows you to know your particular firearm more completely. So, the practice of field stripping and inspecting major components just simply cannot be overdone!
THE SETUP
We feel like people can't be reminded of the 4 Golden Firearm Rules enough and that they obviously apply even during cleaning.
- Always treat every gun as if it were loaded.
- Always point the muzzle in a safe direction.
- Always keep your finger OFF the trigger until you are ready to shoot.
- Always be sure of your target AND beyond.
DO NOT, DO NOT, DO NOT complete this process in the vicinity
of any loaded mags or ammunition.We recommend
leaving ALL the full magazines and ammo in your safe while taking the firearm to ANOTHER
ROOM for cleaning. It IS important during the cleaning process to give any EMPTY mags a quick inspection. Give it a good shake to ensure there is no debris or broken parts rattling around. If the mag has been exposed to some harsh field conditions, take it apart and run a quick nylon brush over all the internals. GO EASY with the lube, springs and solvent residue go together like "lamb and tuna fish".
SUPPLIES:

- Your Owner’s Manual (until you are proficient with the takedown and reassembly of your firearm)
- Cleaning Mat to Protect Your Firearm (parts) and Your Work Surface
- Appropriate Caliber Bore Snake or Bore Brush and Rod
- Quality CLP (Clean, Lube, Protect) Solvent
- Nylon Scrub Brush
- Cotton Cleaning Swabs
- Nylon Picks for Heavy Build-Up
- Cleaning Cloth – and while we certainly sell branded and specialized gun cloths, frankly it is hard to beat an old cotton t-shirt from the garage rag bin!
- A can of compressed air.
FIELD STRIP TO MAJOR COMPONENTS
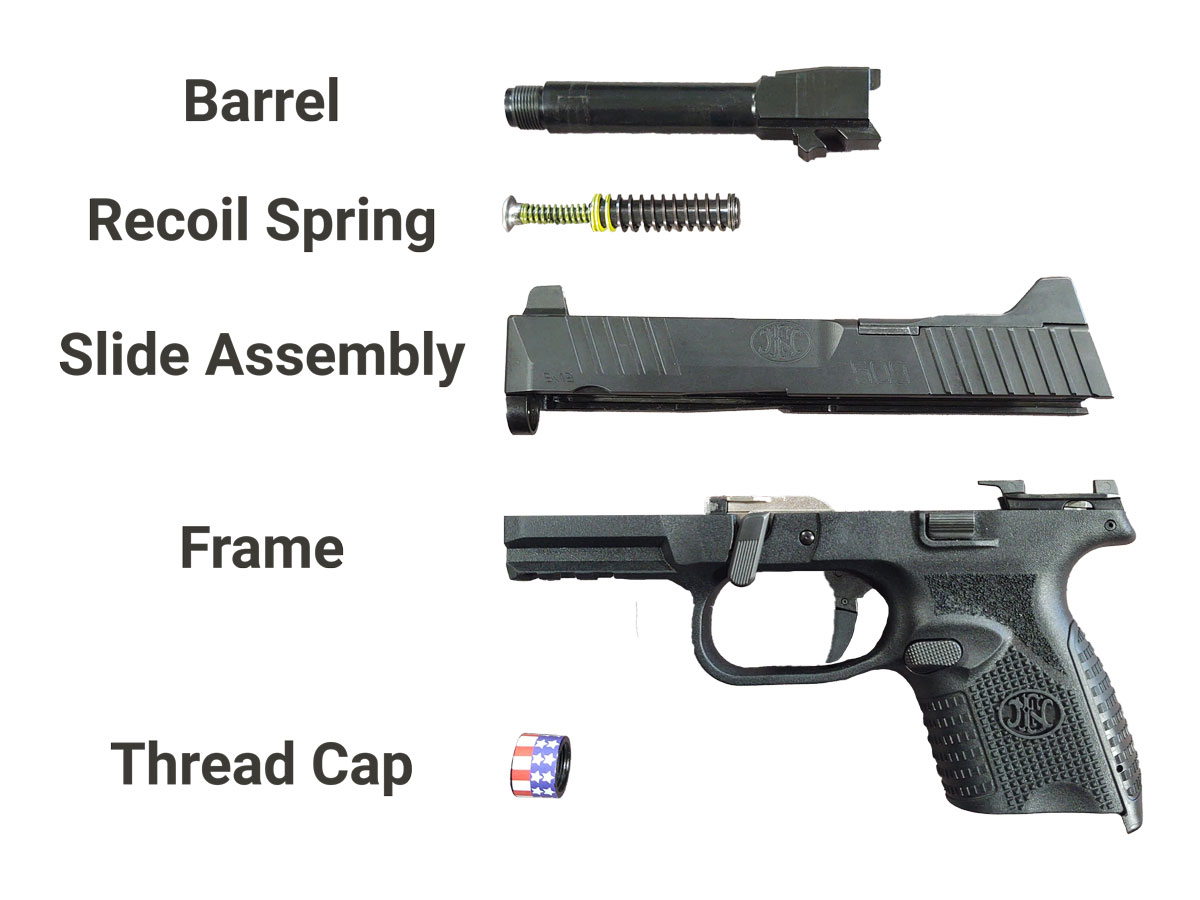
 Frame, Barrel, Recoil Spring Assembly, And Slide Assembly (again,
any loaded magazine should not be in the vicinity of this process).
We also insist that you leave any further disassembly of the trigger group, or action to a professional gun smith.
These next six videos demonstrate some of the common handgun
types and how to break them down into these major parts, followed by reassembly
after cleaning.
- GLOCK Takedown for Cleaning & Inspection: 1min
- Rotating Style Takedown Pin - FN/S&W/Springfield Full Size: 1min
- Springfield HELLCAT Field Strip: 1min
- Beretta Pinned Rotating Style Takedown Lever: 1min
- Model 1911 Field Strip: 5min
- Canik TP9 Button Style Takedown: 1min
CLEAN THE BARREL

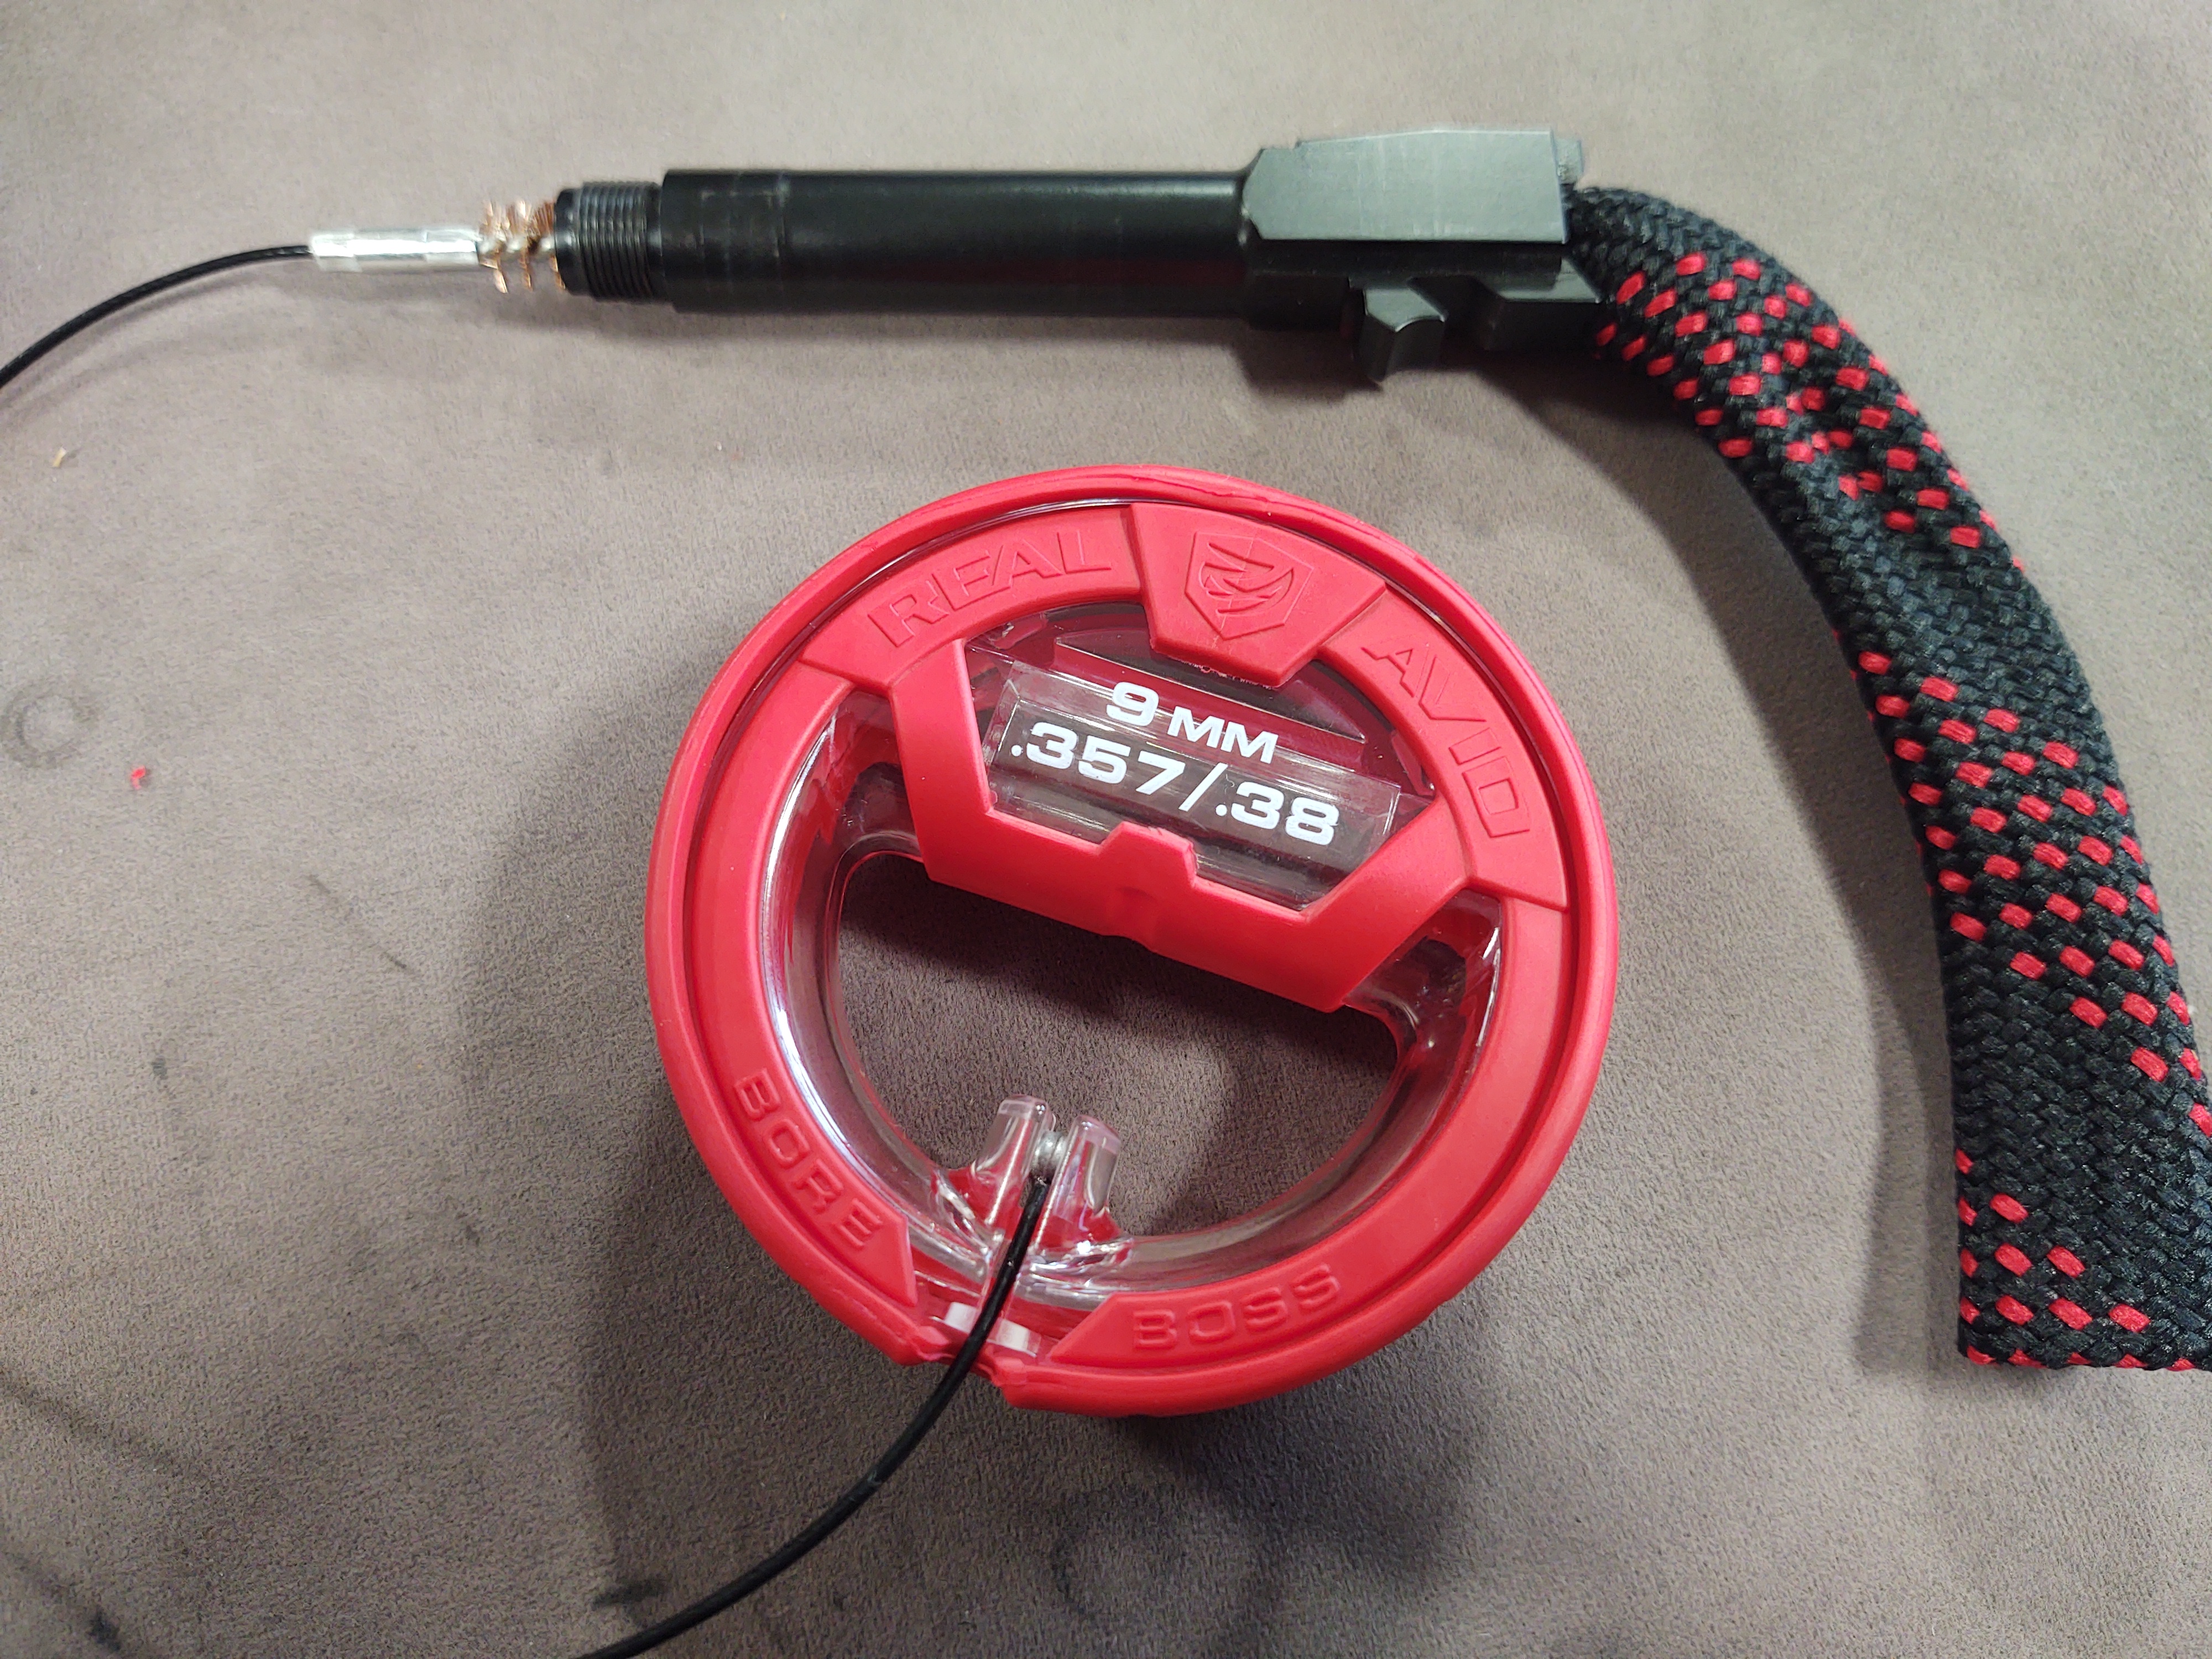
Thread the boresnake through the barrel according to the manufacturer’s instructions and working from the chamber end to the muzzle end of the barrel. This will ensure that none of the super fine “gunk” that you remove will ever find its way into the action of your firearm. Pull the snake through the barrel a few times, then apply some CLP to the appropriate part of the snake and repeat a few more pulls to distribute an even fine layer of protectant to the inside of the barrel.
If you are using a bore brush and rod, follow the same process and manufacturer’s instructions with the correct caliber brush while still ensuring you work from the chamber to the muzzle.
BRUSH REMAINING PARTS
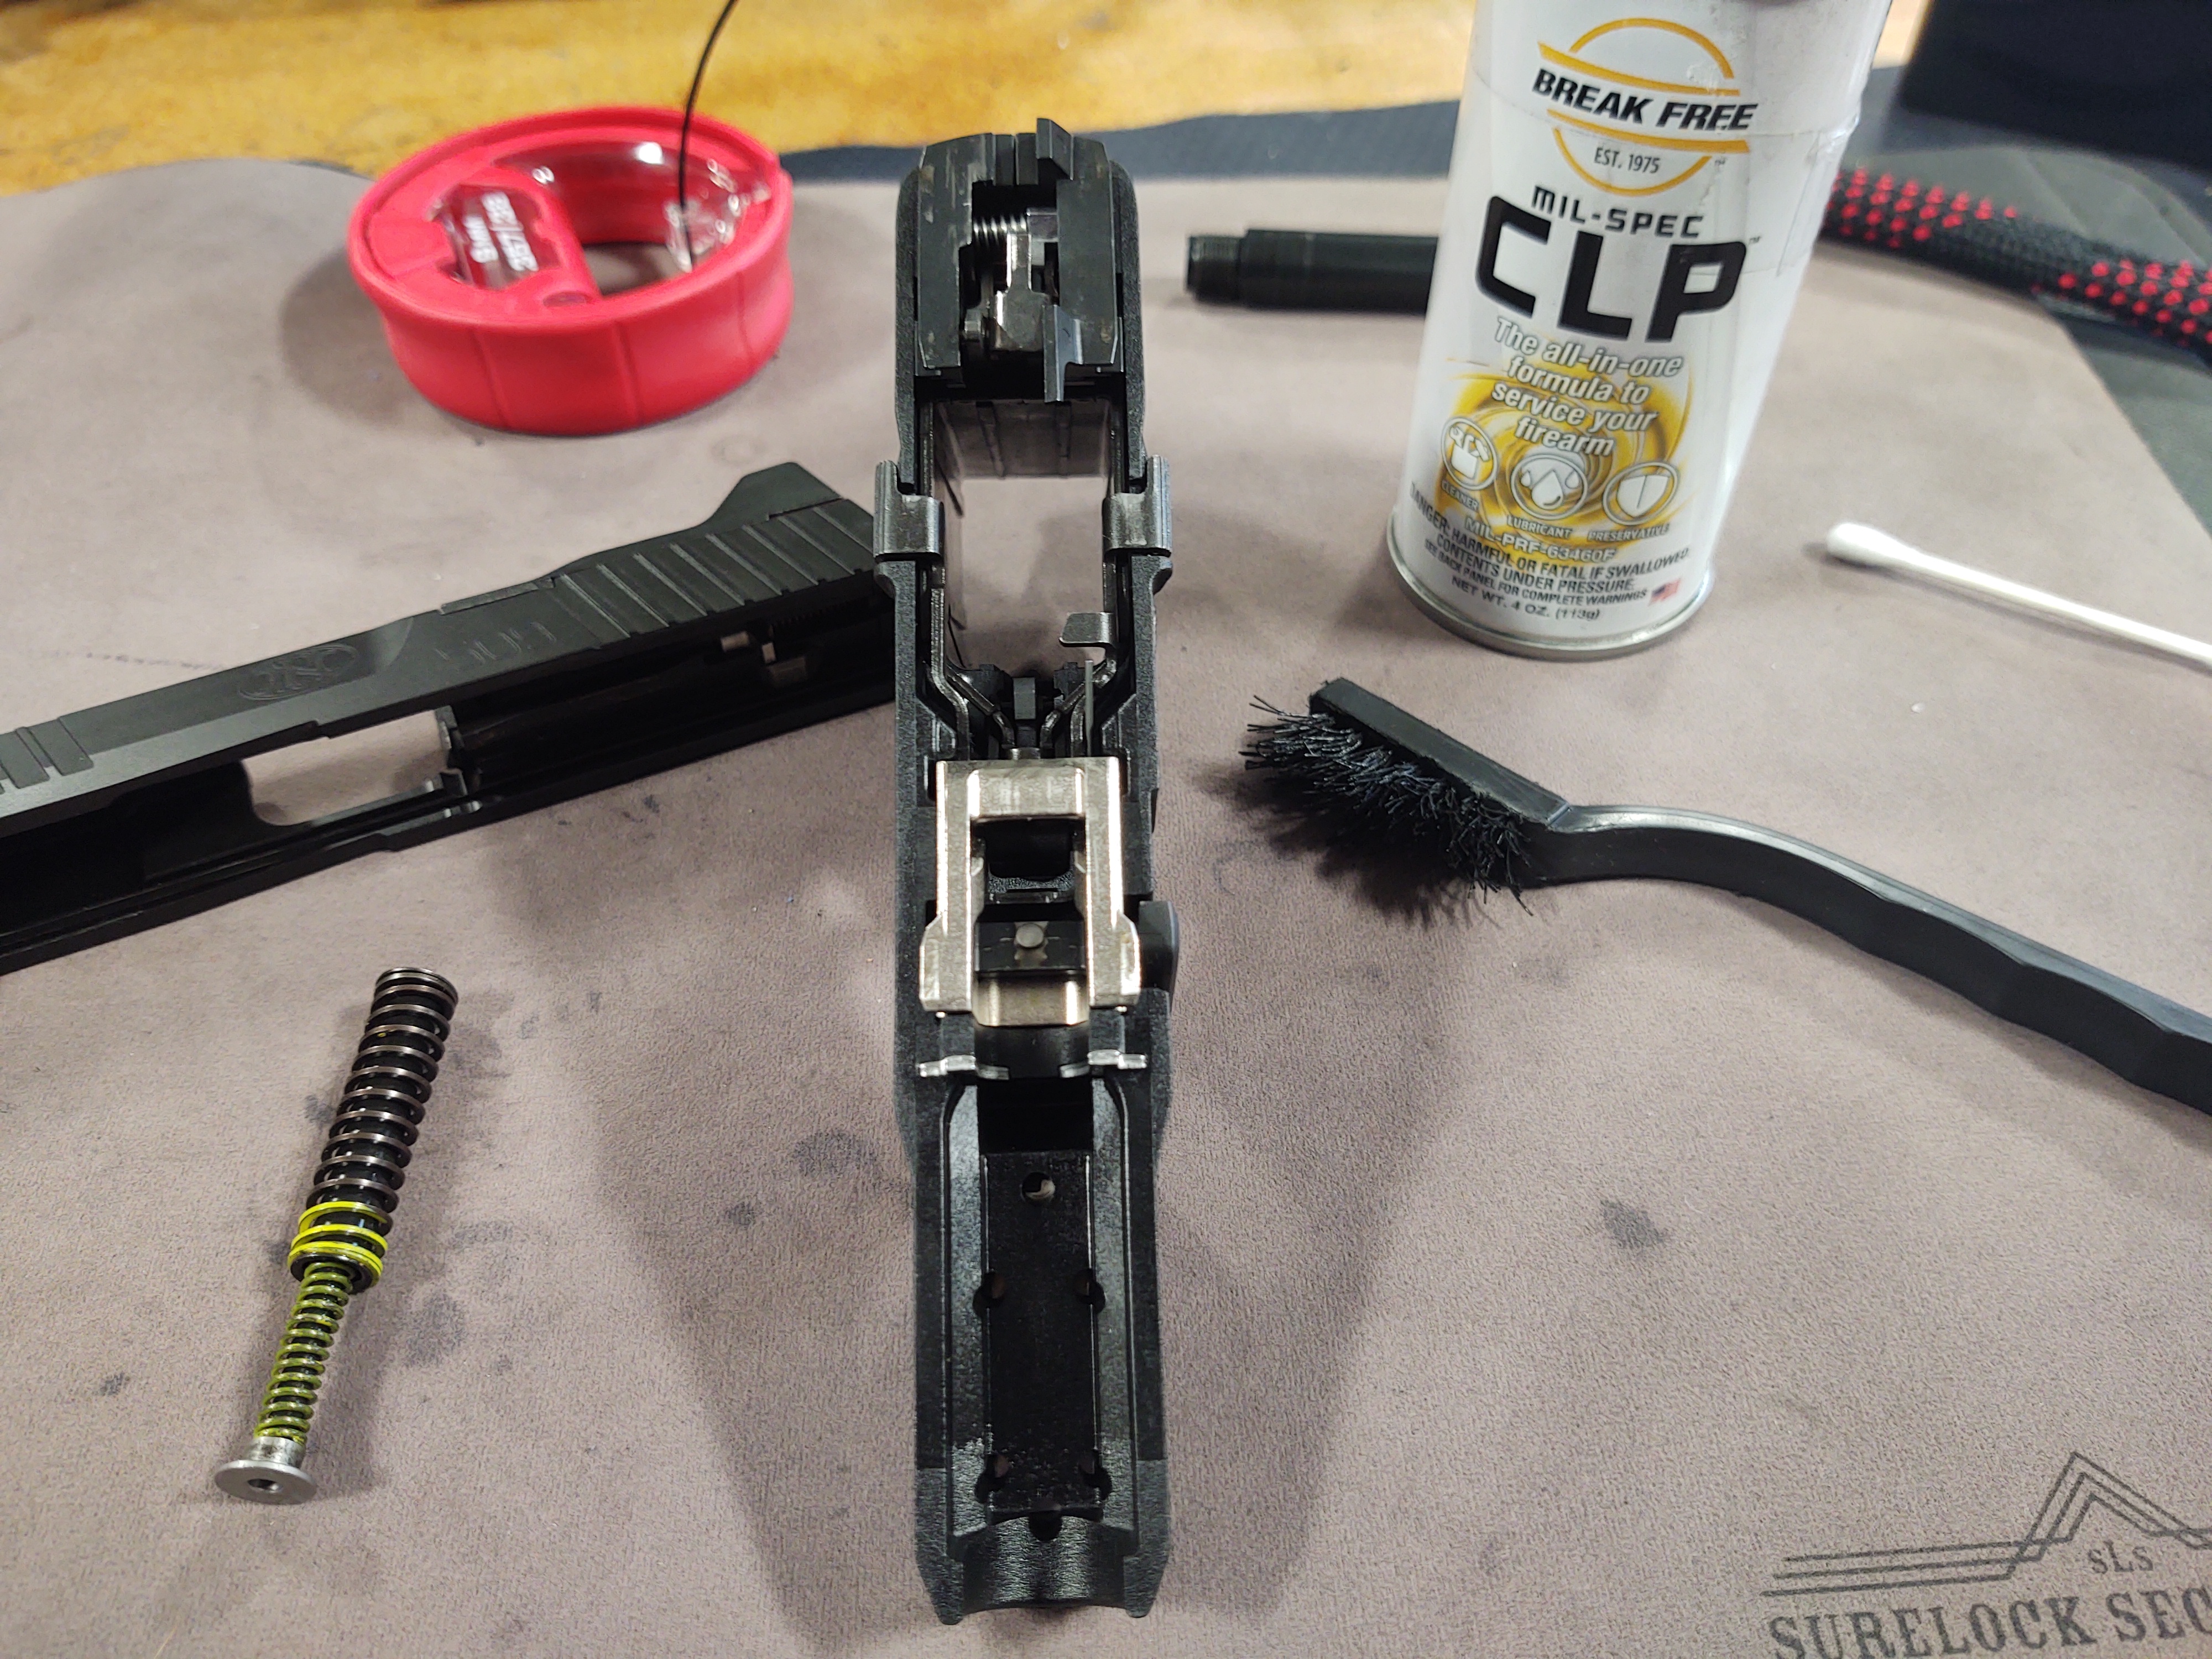
Our process is to apply a little CLP to a nylon brush (frankly an old toothbrush also works well, just make sure you don’t lose a bristle inside any of the components) and run it over all the surfaces that you can reach on the spring assembly, frame, and slide assembly. We have experience with many units that have been “blasted” with a steady spray of CLP or similar solvent which has actually created a lot of residual build up in the trigger or action mechanisms and hurt the reliability of the gun. If those issues occur, they again should only be addressed by a licensed gun smith. The best practice is to make this process a regular part of your shooting regiment which then requires just enough of a quality CLP product to loosen any unspent powder deposits while leaving an ultra-thin layer of protectant against any moisture.
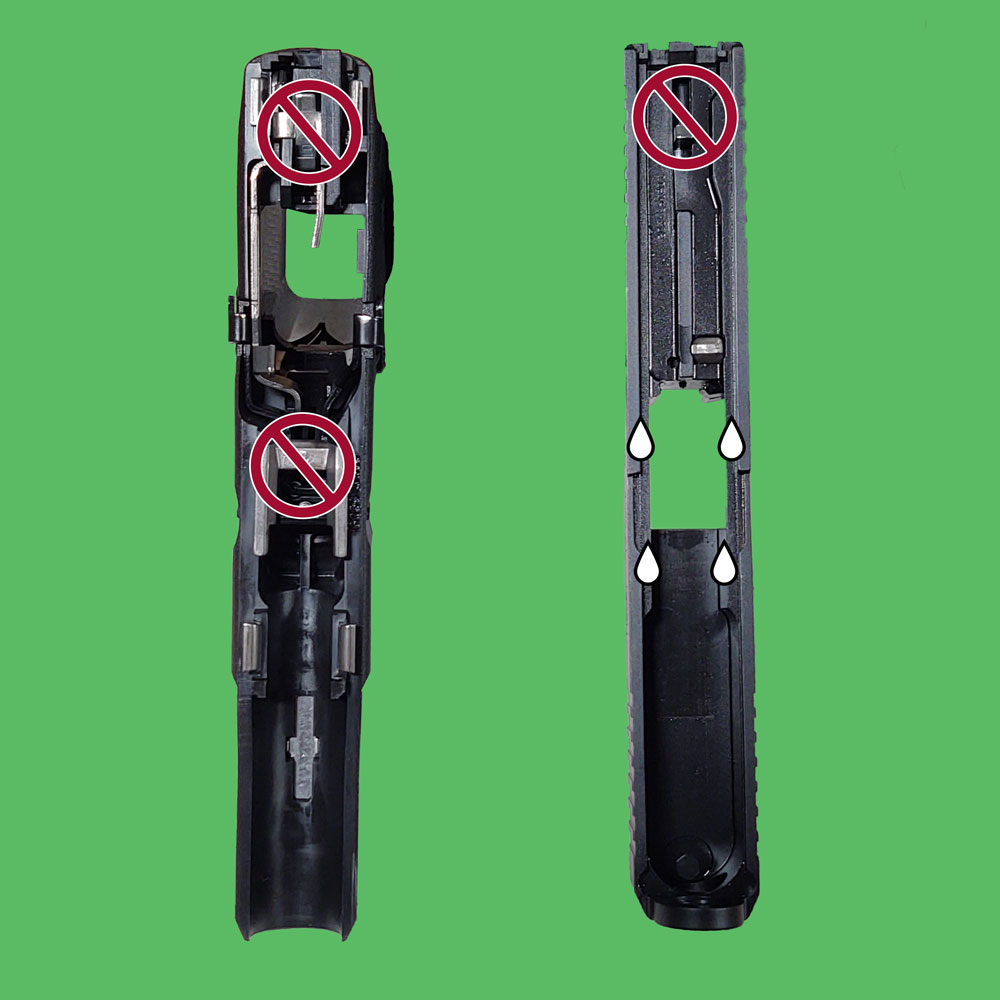
The last step here is to spray off all the exposed surfaces with a can of compressed air, making sure one last time that you work away from the trigger and action mechanisms so as not to blow all the debris you just removed into the most intricate working parts of your handgun.
SPECIFICALLY LUBRICATE FRICTION AREAS

Call me a broken record, but one more time we like to spray a little CLP on a cotton swab and treat the friction points of the major components with a thin layer. Several brands like Hoppes, Pro-Shot or Remington also offer specific gun oil with precision applicators that work perfectly for this job.
A dab of oil inside the grooves of the slide assembly will make its way onto most of the necessary surfaces. This is another critical step to consult the user manual as each specific model will vary slightly in the particular wear points. As more rounds are ran through your handgun, the friction points will become very evident with the finish showing wear and/or discoloration. Any of those points that show themselves after some use should also receive a drop of gun oil. The firing pin and firing pin channel must absolutely be kept dry and no solvents used in this area to ensure the primer is struck cleanly, since after all without this burst from the primer nothing else matters!
REASSEMBLE
Refer back to the videos above to reverse the field strip and reassemble your firearm. Generally, the barrel is reinserted into the slide assembly, followed by the replacing the recoil spring assembly.The barrel and slide can then be reattached to the frame and locked back into place with the takedown lever or latch specific to your make and model.
COMPLETE BASIC FUNCTION TEST
Once your handgun is back together, a simple function test must be performed. In most modern firearms, the firing pin mechanism should not experience excessive stress with a single dry fire during cleaning. However, if your owner’s manual recommends it, or you are worried about wear to the firing pin, employ a snap cap for this process. First, apply the safety (if present) and make sure you are NOT able to activate the trigger. Then take off the safety, pull the trigger and continue to depress the trigger while “racking” or cocking your pistol. Slowly release the trigger only until a “click” is heard and felt, in most common handgun models this ensures that your trigger and action mechanisms are resetting properly. Then pull the trigger again to ensure the firing pin is activated and another “click” is heard and felt. If any of those functions fail, strip the firearm, and reassemble again with extra attention to each step while consulting your owner’s manual. If again, any of those test functions fail, DO NOT LOAD THE WEAPON until it has been resolved by a professional gun smith.
WIPE DOWN ALL EXTERIOR SURFACES
This is fairly self-explanatory, however as the finale to our do not over-lubricate mantra, we recommend applying a quick spray of CLP to your cloth instead of directly to the firearm. This should provide the appropriate thin layer of moisture protection to the exterior of the pistol and prevent any solvent from pooling.
That’s it!! Now for any first-time pistol cleaner that likely seems like “oh yeah right, that’s it. I’ll never figure that out or will end up with a spring flying behind the couch!” And if you get nothing else from this post, PLEASE PLEASE make a commitment that you will break out your semi-auto pistol, your owner’s manual, and our videos, get completely away from loaded mags or ammunition, close the shades if you must and strip that weapon! Now hit the range and start the process all over, we’ll see you out there.
Cleaning sessions with no ammo in the vicinity, are also a great safe time to work on dry fire drills with your holster, your grip and/or efficient sight alignment. Come back to our blog section soon for more maintenance tips.

